Real Time Weather Mapping with mPING

mPING weather display

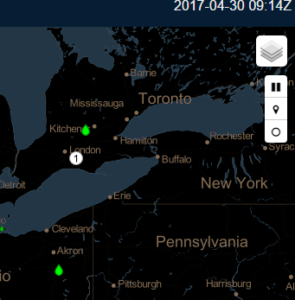
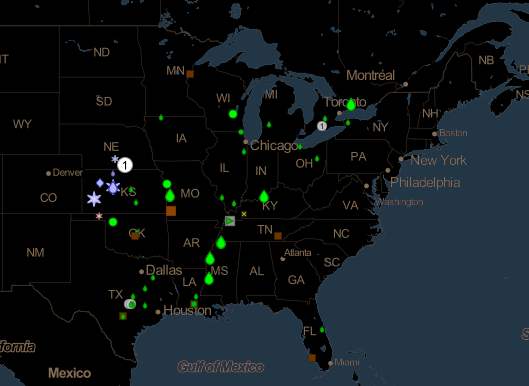
mPING, a real-time weather application, offers interactive insight into what is really going on with the weather in any location around the world. Users can access the app to either anonymously submit reports of current weather at their own location or view reports from others by downloading the app from iTunes or Google Play. All reports are shown through a repeating display over a specific time frame with an icon designating the specific type of weather such as rain, drizzle, snow, flooding, wind, and hail. The same map of the reports can also be accessed online at the mPING website. The image above is a screenshot from the mPING website of recent weather in the midwest. 

The app was launched in 2012 by developers from NOAA’s National Severe Storms Laboratory and University of Oklahoma and the Cooperative Institute for Mesoscale Meteorological Studies to assist in fine-tuning weather forecasts. According the the NOAA website, NOAA National Weather Service (NWS) forecasters can access the reports on their office workstations. This allows them to "overlay mPING reports with other data such as radar and satellite observations to aid them in their decision-making." Also the site reports that "television stations and private weather companies have the opportunity to build the ability to submit and display mPING submissions in their own branded applications, making the information available to the public in new ways."

Some tips to keep in mind while viewing the map:

  • The time frame displayed is over a three-hour period, and the time clock in the upper right corner is set to Greenwich time. (As an aside, per the NWS website: "All aspects of meteorology are based upon a world-wide 24-hour clock called Zulu time (Z), more commonly called Coordinated Universal Time (UTC). You will notice all weather maps, radar, and satellite images all have their time expressed in "Z". The Zulu term stems from military usage while Coordinated Universal Time is the civilian term for this 24-hour clock.")
  • You can start and stop the play of the weather reports by clicking the play/pause button in the upper right. This is the top button in the vertical line of three buttons located under a layer button.mPING menu buttons
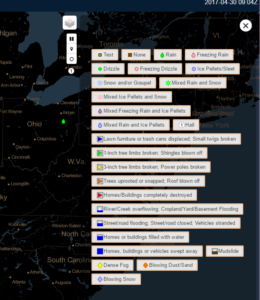
  • A legend for the icons can be found by clicking the middle button in the vertical line of three buttons located in the upper right of the screen. Below is a screenshot of the legend which will slide out after clicking this button. This legend also shows the type of reports which can be submitted. (Click the image for a higher resolution view.)mPING Icon Legend
  •  The bottom button in the vertical line of three buttons can be used to turn on and off the history of weather. Turning it on means that over the three-hour display all weather events will remain showing in the display. Turning it off means that as the weather plays out over the three-hour time period shown, you will only see weather reports at the time they were reported.
  • The layer button at the very top of the upper right of the screen allows the user to change to a topographic background instead of the black default background shown here.
Share

Do you have a permit for that Pokemon?

Pokemon Screen with PokeStops

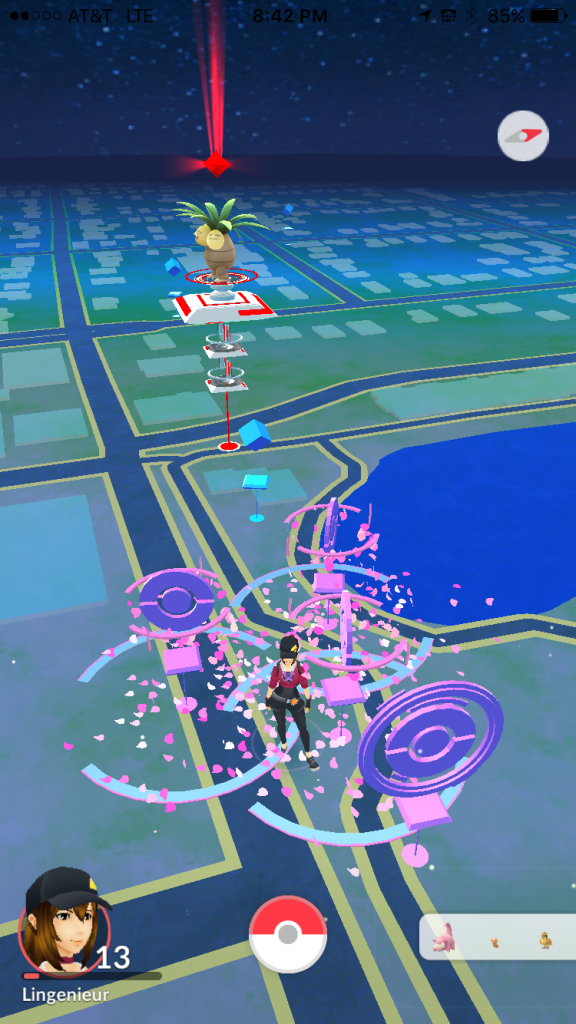
Pokemon Screen with PokeStopsAbout five years ago I wrote a blog post about augmented reality and the concerns a city might have over its potential impacts to a community (see Adding Augmented Reality to Your Zoning Ordinance). But I had not noticed the types of issues discussed in that post actually occuring until this week after the release of the incredibly popular Pokemon Go game. If you have not yet heard about the game, it is an app you install on your phone which represents you on a map of your location and allows you to capture Pokemon who randomly spawn while you move through your environment. As with most games, you level up and collect objects as your Pokemon collection grows. There is also virtual infrastructure supporting the game such as PokeStops typically located at points of interest in a community. PokeStops gift you objects when you visit them and spin the stop on your phone. They can also be set up to attract Pokemon. Other fixed objects in the game are Pokemon Gyms where your Pokemon can battle other Pokemon.

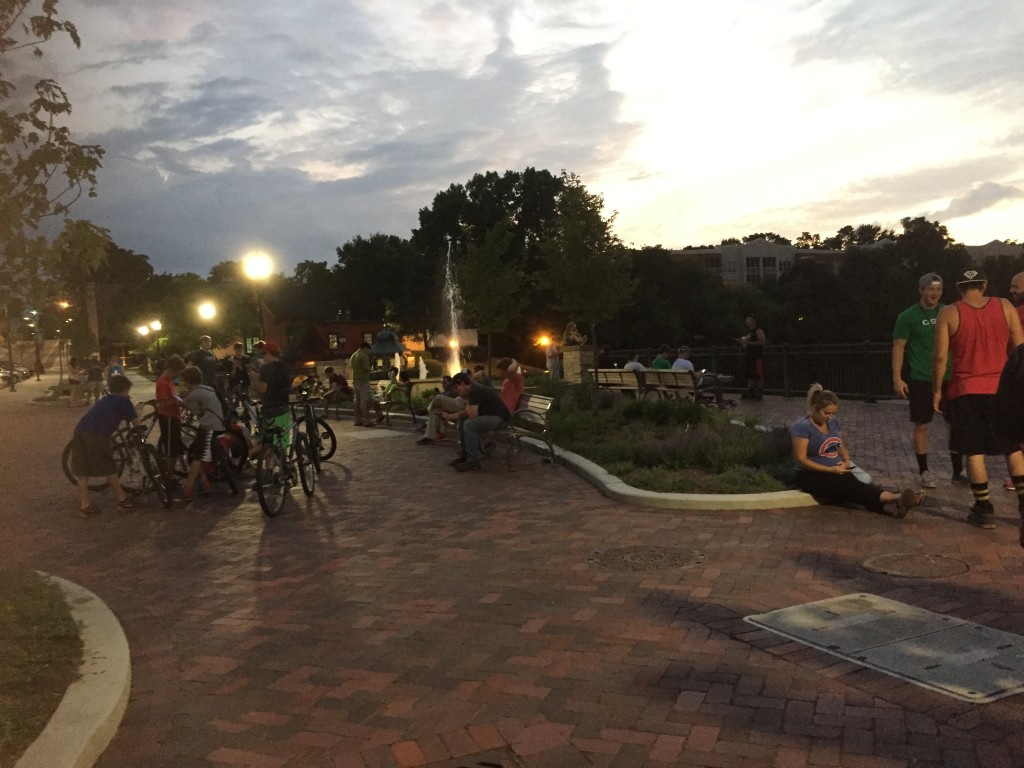
So what is the big deal and how does this relate to zoning? The issue people are having is not only the location of the random spawns of Pokemon, but also the placement of the fixed objects, particularly the gyms. The company which owns the game makes the final determination of where these all occur – they don't need to ask permission from a property owner or the city to place their virtual objects. So there have been reports of Pokemon showing up in places that appear to be on private property, and people are trespassing to catch those Pokemon. While this might be an occasional issue with a random person showing up, the more serious problem reported appears to be with the placement of the gyms. Both the gyms and the PokeStops have the potential to attract crowds of 30 or more people at a time.People playing Pokemon

To get an idea of the concerns gyms and the resulting crowds are causing, here's a Tweet from a person who lives in a home in a renovated church on which a gym has been placed.

If you read through @boonerang's Twitter feed, you will see questions raised about impacts to property value and hours of operation. At what point do the impacts become significant enough to warrant the need for government regulation? And if regulation is imposed, will it be through permits? zoning?Right now, it appears the company is the sole decision maker on whether or not that gym remains at this person's house. While they have offered a method by which someone can report an issue with a gym, the removal is totally at their discretion. Should the local government have the ability to require its removal?

The other topic I have not yet seen explored is the potential problems with the type of virtual content. Pokemon Go is a G-rated game with cute little characters and objects. What if someone launches a more adult game with much more adult content? Someone who might tolerate a cute little Pokemon might not feel comfortable with X-rated content appearing on their property, even if it is only virtual. Should adult use zoning ordinances also apply to virtual content to ensure it does not get placed within so many feet of a school or church? And if so, how would the city regulate this and address complaints? A city employee downloading and installing something like Pokemon Go to check on placement of objects might be tolerated, but would downloading and use of something much more adult be allowed even if only used for regulatory purposes?

The world is definitely changing. And now that augmented reality has actually shown up in the form of cute little creatures, it will be interesting to see if or how cities and other government entities address the use of their virtual spaces. The legal questions which might first need to be answered are do property owners have ownership of the virtual space within the geospatial coordinates of their property and does government have the authority to regulate virtual content within the geospatial coordinates of their boundaries?

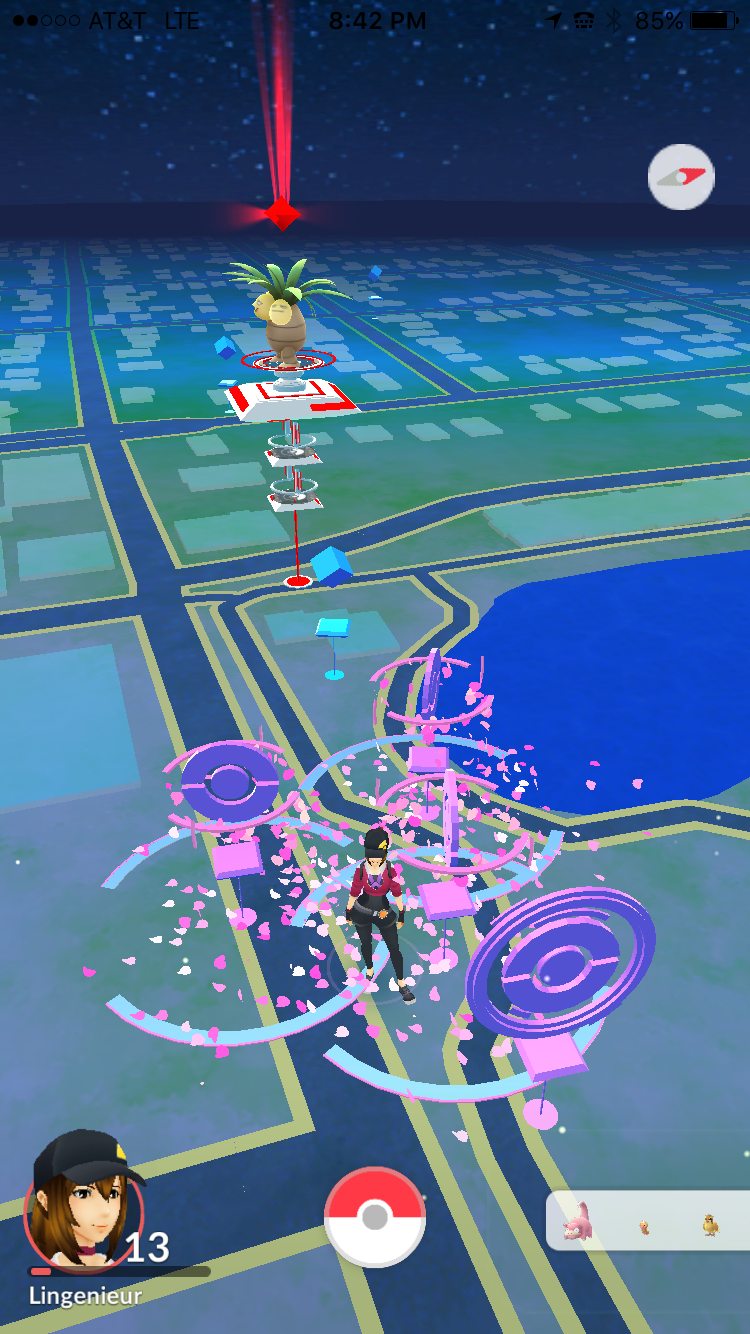
(The photos in this post show a location where people hang out to catch Pokemon. The one photo is everyone playing and the other is a screenshot showing the gym and PokeStops at this location. The pink petals around the PokeStops indicate people have placed lures there to attract more Pokemon.) 

Share

Using Augmented Reality to Visualize Engineering Designs

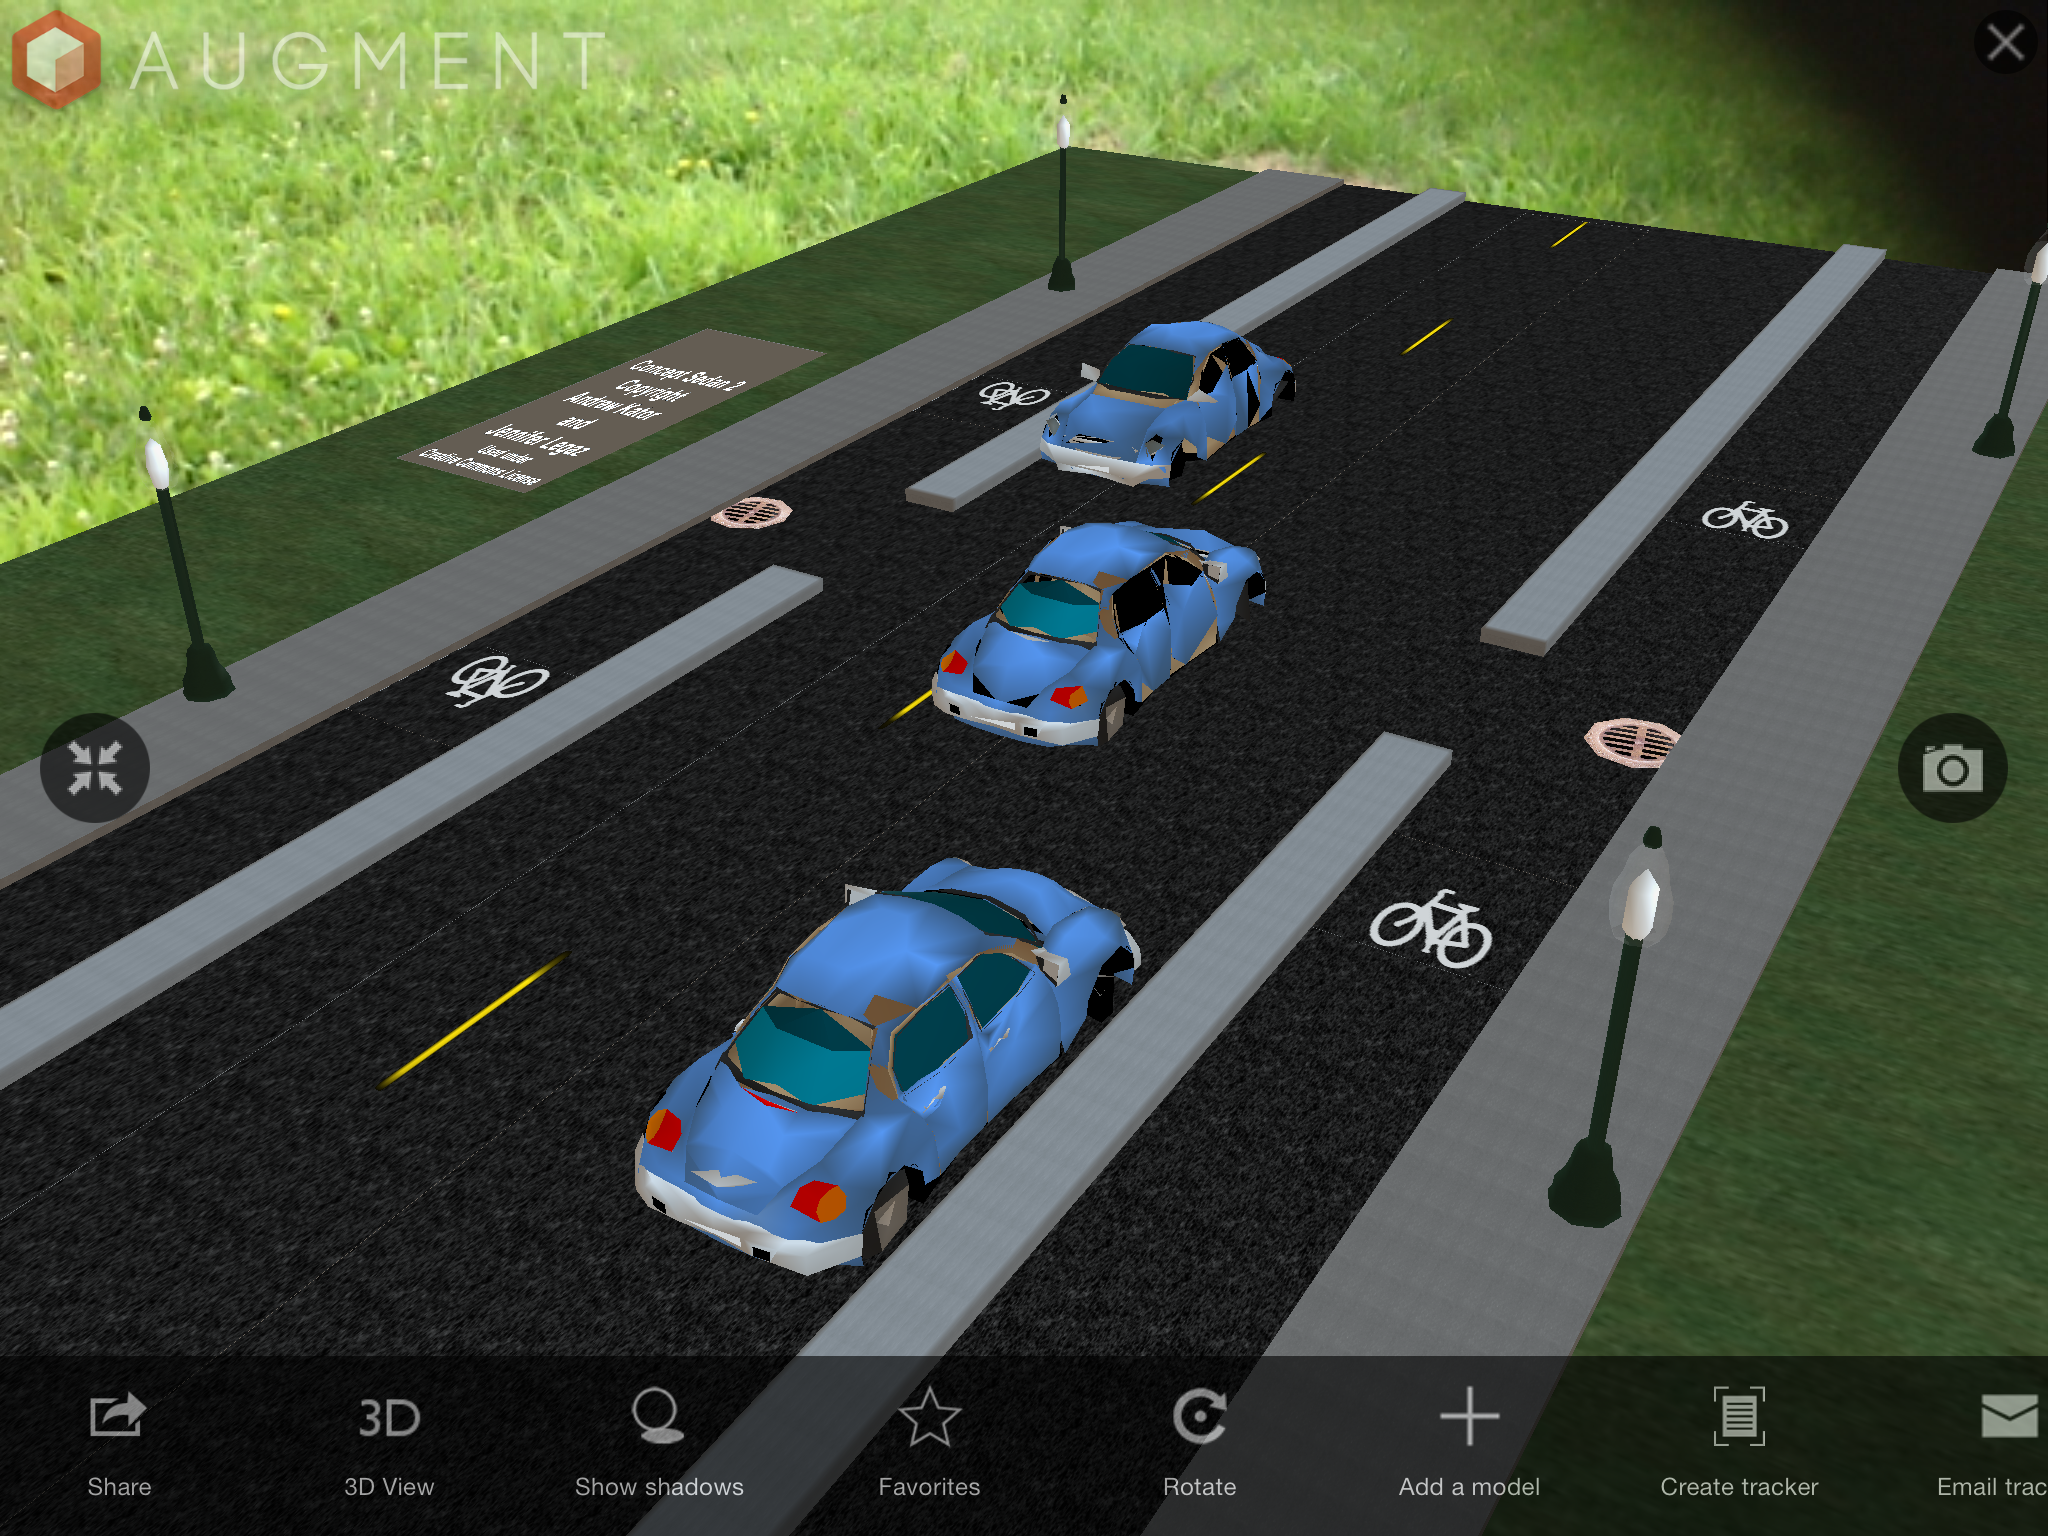
This week I experimented with using an augmented reality app at a public meeting to display this simple visualization of one of our projects.

3D model of a project using Augmented Reality

My experience was that it did seem to help with explaining or showing people not only an overall snapshot of how the roadway will look when finished, but it also helped show specific design and operational details that were difficult to describe. So I figured I'd post a quick explanation of the software I used to create the model and which app I used to host and display the visualization in case anyone else is interested in trying something similar out at their own meetings.

To begin, I would have liked to just export the project directly out of CAD and into the program where I assembled the 3D model because this allows for a more accurate representation and saves some steps. I've done this before using AutoCAD, and it was very straight forward and easy. Unfortunately we use Microstation at work instead of AutoCAD and so far I have been unable to find a way to get this to work with that software. The main problem seems to be that although it has 3D export capability, the program will not allow me to export something with a thickness so everything ends up flat. And it won't let me expand my export in the "Z" direction even if I import it into other 3D programs. I've spoken with a representative of the company, and as I've indicated in previous posts, he said Microstation is not interested in supporting this because they don't see a need for engineers to use this type of feature – as he put it "we're engineers, not gamers." So because of this, I had to create the 3D objects in other programs and use a PDF of the plan view as a guide in placing the objects. Also because of this and my time constraints I only modeled a portion of the project where there were no complex shapes.

So the program I used to create and assemble the 3D objects is Opensimulator. It's a free, open source program that runs as a web service and allows you to create and texture 3D objects then export them as models. You can set up Opensimulator on your own desktop by using something like SimonaStick or you can run it by installing it on your computer and connecting it to a service that allows you to access the interface with the use of a viewer. I used the second option and connected it to a service called OSGrid then used the Singularity viewer to log in and build. The main difference between building with this method and one that would use a more traditional 3D program like Blender is that building in Opensimulator is much more intuitive because you create using an avatar or 3D representation of yourself. Opensimulator has also greatly simplified the creation and texturing of objects.

Here is an "aerial view" of what my "build" looked like inside OSGrid right before I exported it as a 3D model.

As a side note, what is nice about building in Opensimulator is that you can use your avatar to walk through the project and get a feel for how it will function. If we were also building a streetscape, the use of an avatar helps assist in placement of elements. And from what I understand, if I had an Oculus Rift device, I could have put it on and immersed myself in the design as if I was actually there. This is something I hope to also eventually try as a design tool once I get a chance to buy one of those devices.

The only elements in the photo above that I could not create in Opensimulator were the cars and curbed medians. As you can see from the attribution note in the photo, the cars were 3D models I downloaded from the Kator Legaz website then uploaded into Opensimulator using Singularity. And I also uploaded a median that I created in Blender because I wanted the top to be curved like a regular curb is – Opensimulator does not allow for the creation of something like this so I had to use Blender then import the 3D model into Opensimulator. For all the graphics or textures applied to the models, I created them using a graphic software package then uploaded them into Opensimulator. There are many graphics programs that I use, but if you are looking for a good, free program, you can always use Gimp.

Once everything was assembled, I used the export 3D model feature in Singularity to create a Collada file of my build. Then I used my account on Augment to upload the model so I could access it and view it using the Augment app on my iPhone and iPad. Having the model available at the meeting made it convenient to show people what it will look like when built. For example, when I was having trouble explaining how the inlets impact the bike lane, I was able to just use this model to show someone how the inlets effectively reduce the bike lane from 7.5 feet in width to 5 feet if people do not want to ride over the inlet. Overall I would say having the model did enhance the ability to share our project with the community, and I hope to be able to build upon this experience to create more complex and detailed models in the future. If you want to check out the model yourself, you can access it here:

3D Model of Protected Bike Lane

Share

Mobile App for ADA Requirements in the Right of Way

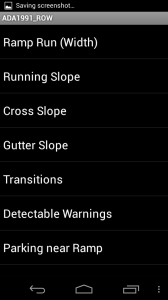
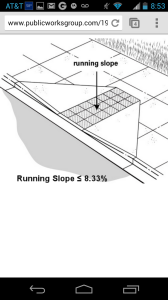
Over the last week, we worked on setting up a basic mobile app to display the requirements from the 1991 ADA Law that relate to facilities in the right of way. For the content, we used the requirements and some of the graphics from Chapter 6 of the ADA Toolkit for Local Government. When it was finished we posted it on the Android marketplace on Google Play for anyone who might be interested in installing it on their Android device. You can download and install it for free from this link:

 1991 ADA ROW Requirements Mobile App

Here are some screenshots from the app:

Screenshot from the 1991 ADA ROW Requirement Mobile App
 
Screenshot from the 1991 ADA ROW Requirements Mobile App
 
Screenshot from the 1991 ADA ROW Requirements Mobile App


We realize that in the near future PROWAG will be finalized and new requirements released so we are also working on developing an app to display those requirements. I'm not sure if we'll get it done before the ruling is finalized, but if so we we might end up releasing it as a draft and then update the content later to agree with the final requirements. If you have any comments or suggestions for the app, feel free to leave them in the comment section or just send us an email!


Share

Chicago Map Tour

Chicago Map Tour Screen Shots

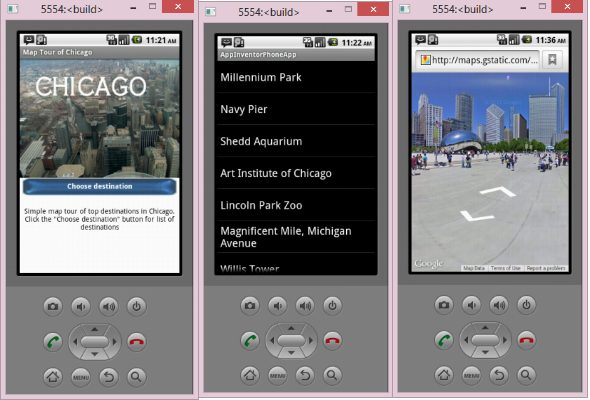
Over the last few days I have been working on building mobile applications for Android devices as part of the August 3D Game Lab Teacher Camp. It hasn't been as difficult as I thought it would be as there are a lot of tutorials out there. There are also some applications that allow you to emulate a device on your computer. My goal is to create a few simple engineering or public works related apps over time. And hopefully by the time the class is over next week, I can offer at least one simple public works app for download. For now, I'll share the most recent app I created in the class using one of the tutorials. It's a simple map tour of the top destinations in Chicago based on the Paris Map tutorial offered by App Inventor by MIT. And it is easy enough to follow that any city could refer to it to create a simple tour of their own community.

Here are the screen shots from my emulator:

Chicago Map Tour Screen Shots


And here is a QR code that will allow you to download the app to your Android device:

QR Code for Chicago Map Tour App Download


If you don't have the ability to scan this, here is the download link:

Chicago Map Tour Android App


And because I could not test this on an actual phone, I'd appreciate any comments or feedback!

Share